

Welcome to the world of rock painting! My family is new to this hobby but we are happy to share what we’ve learned so far and hope you will comment with any ideas or products you’ve had success with!
First of all, if you haven’t heard much about rock painting or wonder what exactly we are talking about, check out this week’s article from Martha Stewart!
If you’ve followed my blog at all, you know I am pursuing minimalism with a passion, and consequently I’m pretty choosy about starting new hobbies or collections. Rock painting fits PERFECTLY into the minimalism lifestyle. The best part of this hobby is that the art is shared instead of hoarded, and each rock is created to be a blessing to the community. I love that!
So let’s get to the specifics of rock painting, are you ready? Here is what you will need:
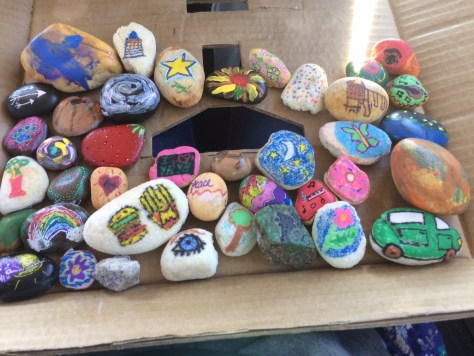
Rocks: “River Rocks” are usually what you want, because the surface will be nice and smooth to apply paint or markers. The Dollar Tree sells small bags of smooth black rocks that work well and are an easy way to start out. I’m looking for a good local source currently. These rocks on Amazon look like a good price for the weight.
Paint: Most acrylic paint should work fine for painting rocks. We used whatever we have on hand for solid colors including craft paint, spray paint and leftover paint samples from the hardware store. My daughters can free-hand well with fine paintbrushes; but for someone like me, (who is artistically challenged) I needed something more user friendly. Which is why we ordered markers…

Markers: These markers by Uni-Posca are AMAZING for rocks! The color is so vibrant, the tip perfect for fine details and it’s pretty quick drying as well. The colors even layer well, with just a brief drying in between. This makes it easy to draw and write on even the smallest rocks.
Rock ID tag: If you are part of our Facebook page, you will want to tag your rock so that it can be shared and re-shared. Click here to download the labels for free! (For smaller rocks these will need to be trimmed to size).
Sealing Spray: The most important step is to waterproof your rocks before you leave them out in the weather. There are lots of clear spray products that will work for this, such as Mod Podge Spray or Krylon Clear Coat Spray. A few light coats should do the trick. You will be ready to hide just as soon as these have dried!
This post contains affiliate links for your convenience.
2 thoughts on “The Ultimate Guide to Rock-Painting”
Comments are closed.